My Yoga Teacher Says That Downward Facing Dog Can Be A Resting Pose, But I Can’t Feel That…
The yoga teacher brings you into downward facing dog and says ‘Hold, breathe, rest for a couple of breaths here and enjoy the stretch’. You are asking yourself how on earth could you rest in this posture and enjoy it? Your wrists are hurting, your lower back feels incredible tight and/or the backs of your legs from the sitting bones (the two bony thingies under your buttocks) down to the heels are aching!
Does that sound familiar? If it does, know that you are not alone. Most of the people find this posture exhausting. And, especially if you are new to yoga, you might find yourself battling with “The Dog”. When I started with asana practice I could not hold down dog at all. After a couple of breaths everything started to hurt. My whole body started to tremble and I had to come down onto my knees out of the posture. But, I did not give up. I kept practicing. And slowly I started to make progress with it until one day I really could rest in it and enjoy.
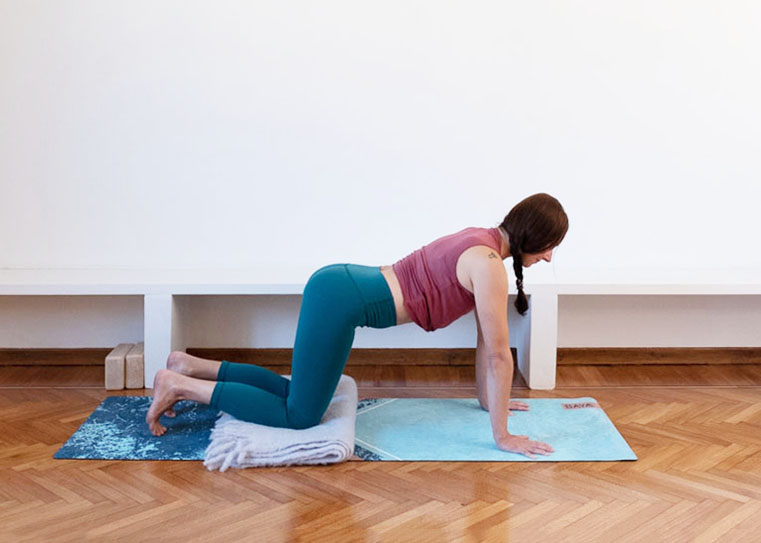
The most important thing in down dog is the foundation of your hands. And, it makes sense to ground yourself through the hands already before you go into down dog, meaning you check the foundation while you still are in all fours. Here is a list to check your hands are truly grounded:
- First of all, spread your fingers. That makes the foundation more stable than keeping your fingers together.
- Your hands should be outer shoulder width apart on the floor. This makes the posture easier for your shoulders. If you draw a line from the middle of your wrist up to you shoulder, the line comes straight up to the outside of your shoulder.
- Check that your index fingers are parallel to each other. Sometimes this means that you need to turn your hands slightly outward. It depends on the architecture of your bones. Experiment!
- Imagine that you are a gecko on the wall: press all ten finger tips into the floor, ground the index finger mound, base of your thumb, pinky finger mound and the outer heel of your palm evenly in to the floor. The middle of your palm does not touch the floor. Your hand is like a suction cup.
- Make your arms strong. Imagine you are lifting the heel of your hand off the floor. It does not come up, but it makes your arms stronger and reduces the stress in your wrists.
All this you should establish already in all fours. First, you might find this tiring, but with time it will get easier. You can also practice this in all fours first. Keep this grounding when you slowly come into down dog.
If you have an injury in one of your wrists or in both of them, or you know your wrists are anatomically different from, let’s say, healthy wrists, or your wrists just keep hurting, (If the last is the case, you should visit a doctor, just to make sure that there is nothing wrong with these delicate joints.), there are ways to decrease the stress on the wrists:
- Practice down dog with your hands on yoga blocks. This will make the extension ankle of the wrists smaller.
- Fold or roll the front of your mat couple of times and practice down dog with the heels of your palms elevated on the rolled / folded mat. This will also decrease the extension of the wrists.
- Practice lower arm down dog, meaning you place your lower arms on the floor, parallel to each other, outer shoulder width apart. This variation is also called the dolphin. This will take the stress completely out of the wrists, but can be harder for the shoulders.
You can try any of these suggestions or maybe you’ll come up with something totally new. Asana practice is like a laboratory. You experiment with your body to find the most optimal way for you to practice. That’s fun! I have a student who is missing one major ligament in one of his wrists. He practices down dog with the whole palm of his hand off the floor, only the balls of his fingers and the fingers itself having contact to the floor. He sometimes also does his handstand like this… but that’s pretty extreme. You don’t have to do that, unless you want to… (wink wink)
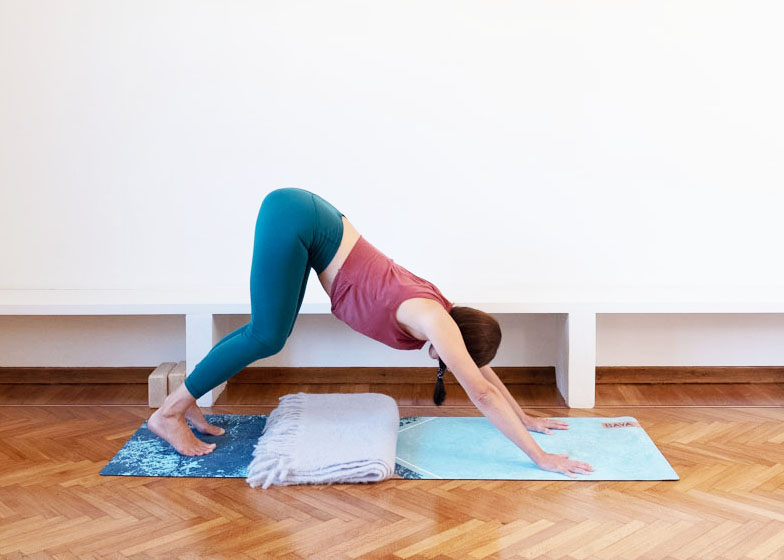
The second important thing in down dog is to keep your back as neutral as possible. Often times this means that you will keep your knees bent while practicing down dog. When you are sure your foundation is optimal and you come into the posture by lifting your knees off the floor and your pelvis back and up, keep in mind that your back should stay and feel long. If by straightening your knees the lower back or the backs of the knees or the backs of your ankles start to hurt, please keep your knees bent. With your heels up and your knees bent tilt your pelvis anteriorly, meaning that you lift your sitting bone towards the ceiling. This will lengthen your spine. It is totally okay to practice down dog like this for a while or even longer. With time you can slowly straighten your knees more and more, but keep the pelvis tilting anteriorly and the spine long.
One way to make this easier is to practice down dog with your heels elevated on the wall and the balls of your feet as well as your toes on the floor. By firmly pressing the heels against the wall, tilting you pelvis back and up and then straightening the knees will make the stretch in the backs of your legs more active. This means the muscles of the legs are not passively stretching but working to make the posture stable and the stretch safer for your body.
So, that’s it for today. If you have any questions or comments, please feel free to share them with us. We’d love to hear from you! See you on the mat!
Love,
Anu
 Anu Visuri
Anu Visuri, yoga teacher and co-founder of Gotta Joga
Certified Anusara® yoga teacher registered with Yoga Alliance (E-RYT 500 & YACEP).